
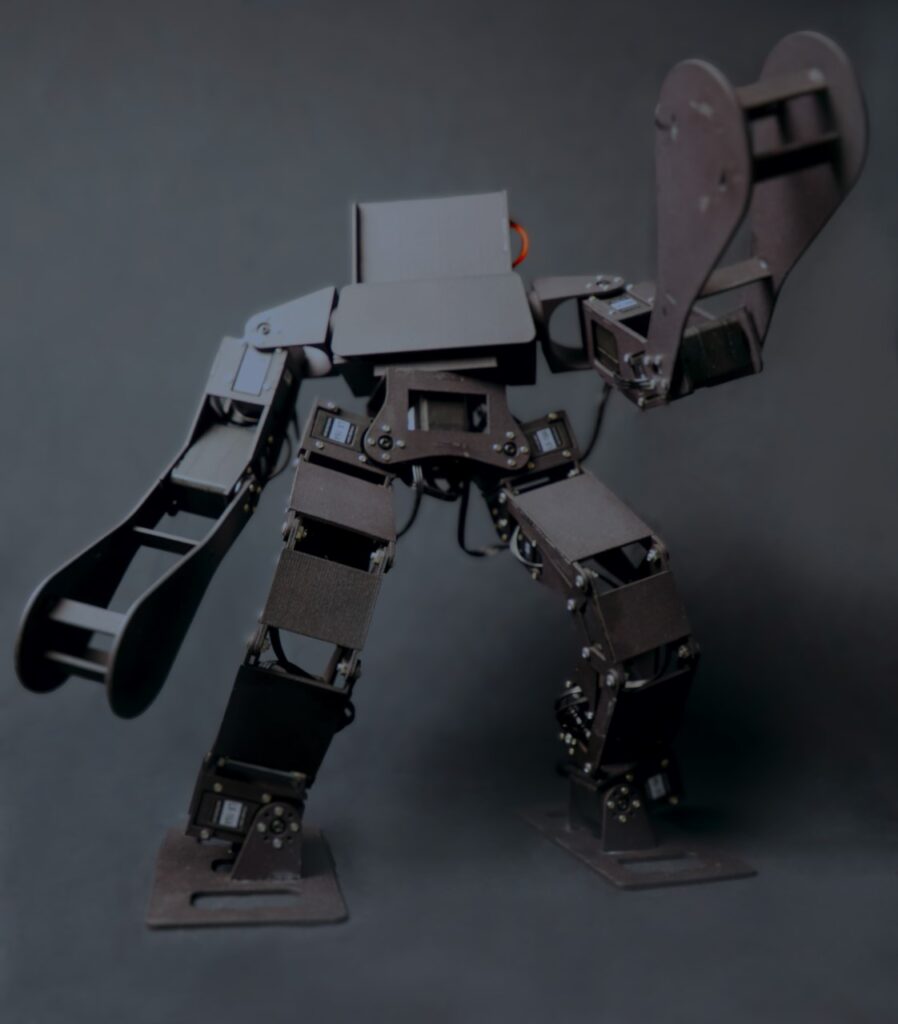
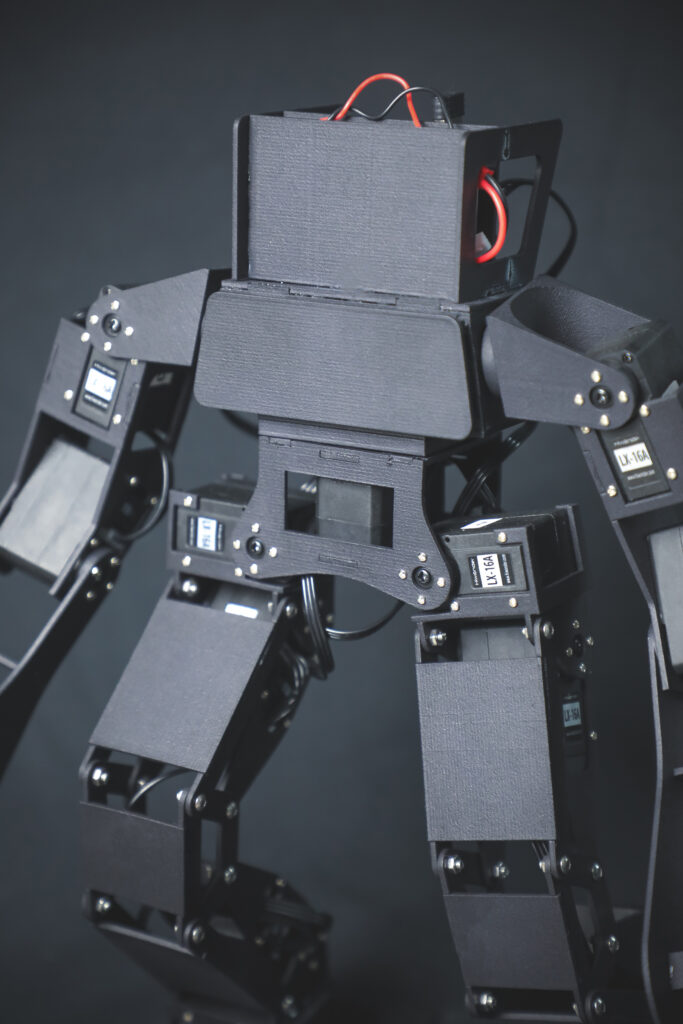
We recently built the 3d printable fighting robot by Matt Cho. Programming was a lot easier than expected and we would like to share our experience in this article.
Set Up
First, you would need to print off all of the STL files. If you do not have a 3D printer, there are several companies that can print for you. We went with Wenext.com, they printed all of the STL files in black Nylon PA12. All of the parts arrived bagged and tagged by the file names, making assembly more organized. The first steps are to set up the ID parameters on each servo motor using the TTL/USB Debugging Board and Bus Servo Terminal software from HiWonder. To identify each servo, we placed corresponding numbered stickers on each of the 15 servo motors to match the parameter ID’s that were set up. For simplicity, install even numbered servos on the right side of the robot and odd numbered servos on the left. This will make programming less confusing. When we constructed our robot, we installed all of the parts with the robot standing straight up and arms down as our zero position. This resulted in a successful position for the servos degrees of movement.
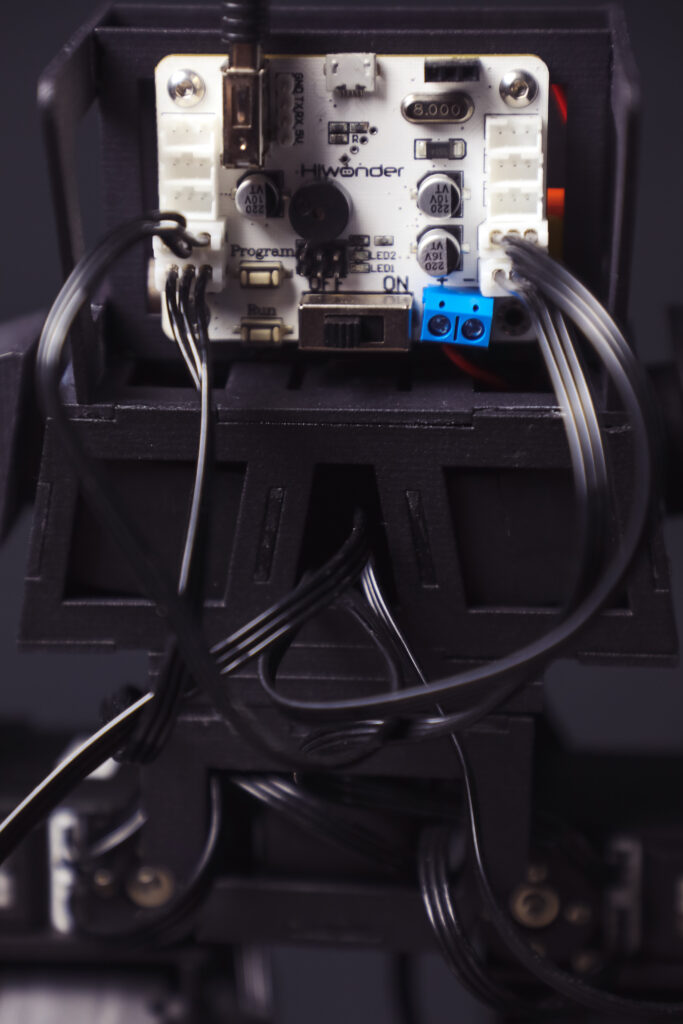
After the build is done, daisy-chain all of the servos together and connect to the serial bus controller. Next, install the battery and connect the servo controller to a pc using the included USB cable. Open the bus control software to get ready to program.
Programming demonstration
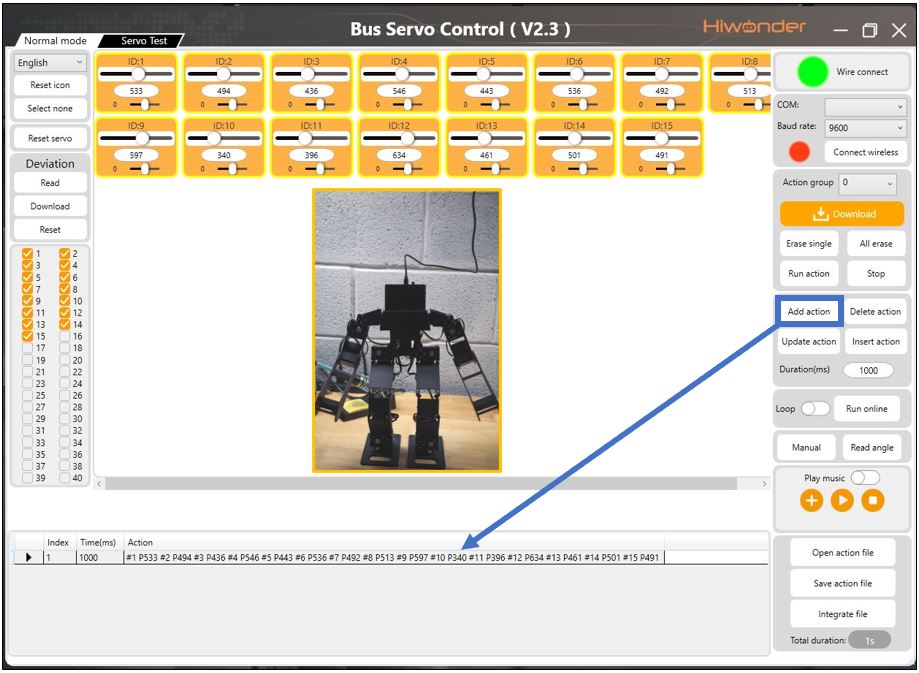
The controller can handle up to 40 servos which are listed on the lower left of the Screen. Each servo has an ID number, a top slider for position control and lower slider for deviation. Creating “a move” consists of moving from position to position. Each position is set by using the sliders.
Here’s a summarized demonstration of how to make a short program. The task is to raise the right arm by the shoulder (Servo ID #2) and return back to the lowered position.
- 1. As you see all the servo positions are all over the map. This is the robot’s stance that we saved. We will start by adding this action as the start of the program with the arm down. (Click ADD ACTION). The coordinates are now listed below.
- 2. Next we will raise the right arm by moving the slider on Servo ID #2. Once we have it where we want (straight up) we click ADD ACTION.

- 3. After we want to return to our start position. To do this simply right click the 1st action and copy it, then select the second action, right click and select paste down.

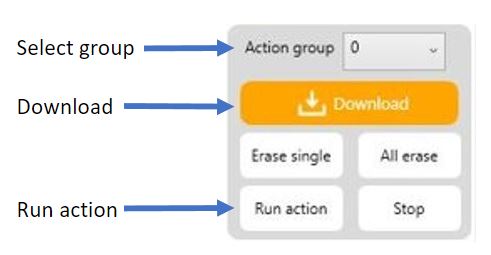
- 4. To run this action. Select an action group and download to the robot. Then click RUN ACTION. The arm should raise and lower. (You can download up to 230 action groups into the robot)
You will notice that we included a ‘home stance” position that serves as the start and end of each move. This ensures that there will always be a known, stable origin from which to build your moves. Since this programming interface allows you control position and speed of each move, it is only limited by your creativity and patience.
Additional Accessories
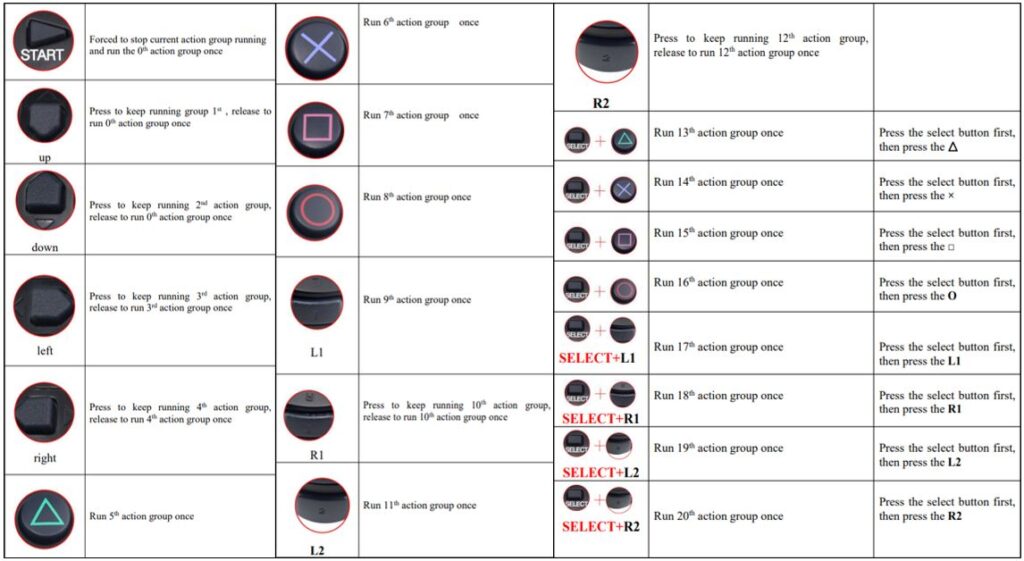
This project is designed around a “fighting robot”, therefor having control with a PS2 controller makes a lot of sense. We recommend ordering the Hiwonder PS2 controller with USB Receiver because individual moves can be assigned to specific buttons on the controller. This is also very user friendly to setup. The Controller is preconfigured, each button runs a preassigned action group. All you need to do is plug in the receiver and download your actions to the group numbers preassigned to each button.
Conclusion
The performance of this robot was great. The structure is well balanced, the servos are fast, precise and consistent. The response time after pressing a button on the controller did not have any delays, making it feel like a video game. The only downside that we found was that the 3D printing material was brittle. This resulted in a piece breaking. All in all, this was a fun robot to build and program. I would highly recommend this project. Check out the part list and sources listed at the end of the article, if you want to do the same.
Parts List that goes with this project:
- STL files for 3D printing of the robot body parts. https://itsmattcho.gumroad.com/l/fightingrobotv1
- Hiwonder LX-16A Servos (15 servos)
- Hiwonder Serial Bus Controller Board
- Hiwonder TTL/USB Debugging Board
- Battery – We used a 7.4v 2 cell 530mAh battery with a JST connector. I would recommend ordering two of them as they don’t last too long and halt programming if you can’t constantly swap.
- Hiwonder instructions, user manual and Software is all available for free at Hiwonder.com
- M3x8 Button head screws with nuts (Quantity=24)
- M2x5 Screws for servos and servo horns (Quantity=220)
- M2x8 Screws for servos and servo horns (Quantity=12)
Did you use the plastic servo horns that come with the lx-16a?
I have built one of these also and am wondering if a metal horn would help with some backlash that I am getting in the legs
Hi Jessie,
yes, I used the plastic servo horns. I did not have any issues with backlash yet. Also, I am slowly working on creating metal parts for this build so it can handle the hiwonder hx35 servos.
That’s super cool, I am working on a way to weld together the pla parts with a 3d pen to keep them just a little stronger. I would love to see what moves you have created for yours. Hx35 is 12v, will the hiwonder controller handle 12v?
Unfortunately, I do not have too many cool moves. I did a good walk and some punches, etc. It would be a good idea to brainstorm a way that everyone can zero (master) them all the same. Maybe make some sort of master fixture. That way we could share programs, recover from failures, etc. As for the 35 servos, they are 9 to 12v. The controller can handle 12v, typically an 11.1v battery is used in conjunction with the controller/servos. Also, I am interested in hearing how the 3d pen weld holds up.
I have built two of these robots now and am working on programming. I can get all sorts of moves without much issue but walking seems to kick my butt. Any suggestions?
It was awhile since I did the walk but if I remember correctly I did two steps and ended them in a way that they would repeat flawlessly. Then I called the stance program when letting go of the forward button. As for the actual steps I found that it’s better to focus on the stationary leg pushing off and lounging forward, rather then the lifting leg. Basically, I walk in 1000 circles trying to figure out how I do it, then program it. Also, I use the same positions for each leg. Once I get one step good, I carry the positions over to the othe step. This can be very confusing. I will suggest a note pad and a calculator for some basic math. I can send you the program but I don’t think it will be much help as our zero positions are going to be completely different.